
I am not an expert on bread baking in the slightest. I have only been doing it for a year, so I am trying to learn as much as I can and try as many recipes as I can. I love cookbooks and bought a bunch of bread baking ones, but I found myself scouring the cookbooks for recipes that do not use a starter. Who has time for a starter? Feeding it and waiting around? Plus, they sound kind of scary – Biga? Poolish? What do those words even mean?
Then this past weekend I decided it was time to get over my fear and make bread with a starter. And boy am I glad I did. It brings the bread to a whole new level. The flavor is more complex and the texture is just perfect. I guess there is a reason that over half the recipes in my cookbooks use a starter.
There are various types of starters, but I used a very basic method from Joanne Chang’s Flour cookbook. The only hard part about using a starter is timing. But on a cold winter weekend, I have nothing but time for baking!
On Saturday morning, I mixed together flour, yeast and water – it took about one minute and then I let it sit for 8 hours while I went about my day. Ok that part was easy! Then before I left to go out, I mixed in some more flour, stirred, and put it in the refrigerator to sit overnight. Starter is done! I can’t believe that it took me a whole year to get over my fear of a starter, it was so simple. The next morning, I made the bread, following Joanne’s recipe. I secretly love recipes that use a Kitchen-Aid Mixer to do the kneading. It is so much easier than kneading by hand.

Starter phase 1, after resting for 8 hours. Now add in 1/4 cup of flour, cover, and put in the fridge overnight. That was easy!
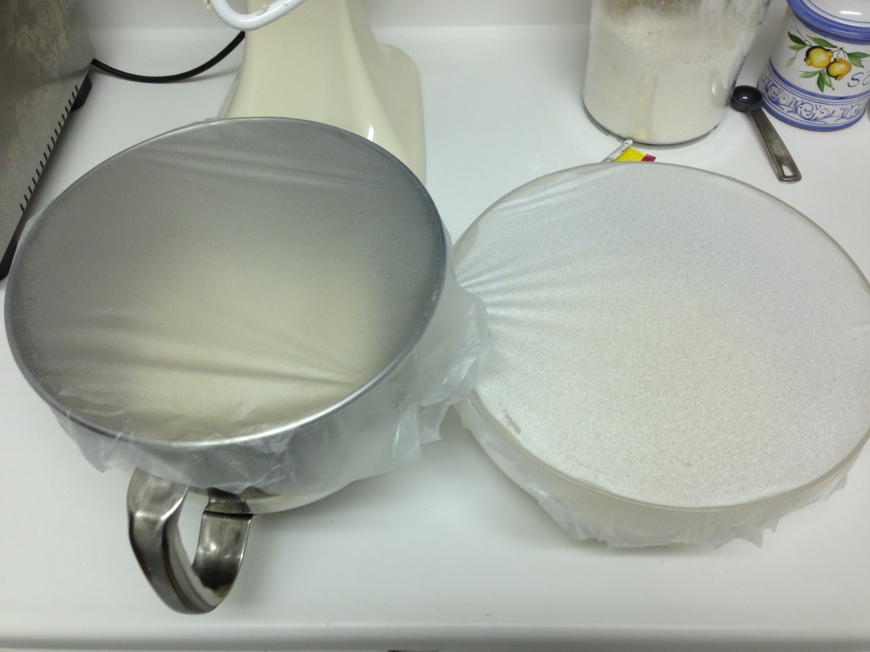
Mix together first igredients for the dough, and let it sit for 10 minutes. Hanging out with the starter.

Bread dough is ready for the starter to be added. Knead for about 4 minutes.

Put the kneaded dough in a lightly oiled bowl and turn to coat the dough with oil. Time to rise for 2-3 hours

Divide the dough in half and shape into two loaves. Space them far enough apart so that they have room to rise. Mine were too close!

How pretty is this dough? About to go in the oven.

The finished product.
Recipes from Flour
Sponge: This makes 12 oz
3/4 cup (180 grams) water
1 1/4 cups (175 grams) unbleached all-purpose flour
1/4 teaspoon active dry yeast
In a medium bowl, stir together the water, 1 cup (140 grams) of the flour, and the yeast until well combined. Place in a covered container and leave at room temperature for at least 4 hours and up to 8 hours. After the waiting time, stir in the remaining 1/4 cup (35 grams) of flour. The sponge will stiffen up with the addition of the flour into a very loose dough. Re-cover it and leave it in the fridge overnight.
Country Bread: Makes 2 8-inch loaves
1 1/2 cups (360 grams) water, body temperature
2 cups (280 grams) unbleached all-purpose flour, plus extra for baking
2 cups (300 grams) bread flour
12 oz (340 grams) bread sponge
pinch of active dry yeast
2 tsp kosher salt
1 tsp sugar
a handful of medium-coarse yellow cornmeal for the baking sheet
In the bowl of a stand mixer fixed with the dough hook, stir together the water, 2 cups of all-purpose flour, and the 2 cups of bread flour for about a minute, or until you have a shaggy, stiff dough. Cover the bowl with plastic wrap and let sit for 10 minutes.
After 10 minutes, remove the plastic wrap and add the sponge, yeast, salt, and sugar. Mix for 3-4 minutes on medium0-low speed or until they are incorporated (you might have to stop the mixer to scrape down the bowl or the hook). The dough should be somewhat sticky but still smooth and feel like an earlobe when you grasp a bit between your fingers. If the dough is stiffer, add some water 1 T at a time. If it is too loose, add all-purpose flour 1 T at a time.
Transfer the dough to a lightly oiled bowl, and turn the dough to coat it. Lightly cover the bowl with an oiled piece of plastic wrap and let it sit in a warm place for 2-3 hours. The dough will rise a little bit and will be loose and relaxed and a little sticky.
After the dough has risen, turn it out onto a floured work surface. Divide the dough in half using a knife or bench scraper and shape each half into a ball. The easiest way to do this is to tuck the edges of the dough underneath itself, continuing to tuck until it naturally gathers into a ball with a nice taut surface. Sprinkle the cornmeal (I just used flour) on a baking sheet and place the loaves on it, at least 3 inches apart (I would make them even farther apart – mine rose into each other!). Cover them lightly and completely in more plastic wrap and let them sit for another 2-3 hours. They won’t rise too much, but they will seem softer and you may see some bubbles forming just under the surface of the dough.
While the dough is resting (towards the end of the rest), preheat the oven to 500 degrees, with a rack in the center and a rack below that one. Place a rimmed pan on the lower rack. When the loaves are done resting, sprinkle the tops with about a teaspoon of flour each, and slash the loaves with a very sharp knife or a razor blade. You can do whatever design you like.
Put the bread in the oven, and then quickly but carefully pour 2 cups of water in the rimmed pan on the bottom shelf and shut the oven door. The steam creates a nice moist atmosphere for your bread to grow. Bake for 35-40 minutes, or until the loaves are a dark golden brown on top and make a hollow sound when you thump them on the bottom. Transfer the loaves to a wire rack and let them cool for at least 1 hour.





Gosh, those are beautiful little things. What did the crumb look like? I love a good picture of crumb structure. I am also just getting used to bread. Here of a few photos, the caramelised onion and thyme foccacia that I made today (also using a starter- so its super tasty)!
http://thephilosophyofdelight.wordpress.com/some-very-important-photographs-of-bread/
Thank you! I realized that I forgot to take a picture of the cut bread 🙁 I would say it was soft yet substantial. Not quite as airy as the no-knead bread. Perfect for sandwiches!
The crust on these looks wonderful! I love the way you slashed the top to look like a tree. 🙂
Starter really makes for an amazing rise– and it’s not too scary! I made my first bread from a starter about two years ago, and I never looked back. Looks like it’s working out for you here, too!
I love the blog; and thanks for the follow! 🙂
Thank you! I’ll have to look through your old posts for some recipes using starters, a whole new world is opened for me!
Thanks for this post! I Havent used a starter before but i feel better about using one now after this post! They always seemed scary to me. I love that you noticed a big difference in the flavour and texture too!
I’m so glad that I can ease your fears about using a starter! I really think you will love it once you try it!